
|
|
 |
 320x240Fig 1640x480 |
 320x240Fig 2640x480 |
 320x240Fig 3640x480 |
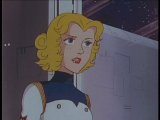
| Figure 1 is of an officer in the engine room barking an order just before the Rugger Guard's (Explorer) engines are shut down. Figure 2 shows Aki (Jeff) looking out the window as his team mates walk up to him. Figure 3 is a close-up of Patti (Ginger) talking to an off-screen (Aki). |
 320x240Fig 4640x480 |
 320x240Fig 5640x480 |
 320x240Fig 6640x480 |
| Figure 4 shows Aki (Jeff) listening to Patti (Ginger). Figure 5 is a close-up shot of Aki's (Jeff) video monitor in his vehicle shortly after the Rugger teams launch, Patti (Ginger) visible on the monitor's screen. Figure 6 is a close-up of Kai (Rocky) making a comment about something. |
 320x240Fig 7640x480 |
 320x240Fig 8640x480 |
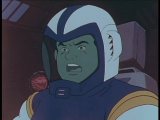
| Figure 7 is a close-up of Patti (Ginger). Figure 8 is a medium shot of Aki (Jeff). |
 320x240Fig 9640x480 |
 320x240Fig 10640x480 |
 320x240Fig 11640x480 |
| Figure 9 is a shot of Ise (Hawkins) yelling something to Aki (Jeff) after the Combat Machine (Robeast) is launched. Figure 10 is of Patti (Ginger) being startled by how close the Combat Machine (Robeast) has come to DaiRugger. Figure 10 is a close-up of the Combat Machine (Robeast). |
 320x240Fig 12640x480 |
 320x240Fig 13640x480 |
 320x240Fig 14640x480 |
| Figure 12 shows a Galbeston (Drule) ship appearing from the left against a completely black background. Figure 13 is a close-up of Kiitsu's (Krik) face at the end of Ise's (Hawkins) speech. Figure 14 shows the Galbeston (Drule) ship moving further along. |
 320x240Fig 15640x480 |
 320x240Fig 16640x480 |
 320x240Fig 17640x480 |
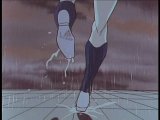
| Figure 15 is a close-up of Walter's (Cliff) face. Fugure 16 shows the Galbeston (Drule) ship still moving along. Figure 17 shows the back of Aki's (Jeff) feet and legs as he runs across the Rugger Guard's (Explorer) outer deck as rain pelts down. |
 320x240Fig 18640x480 |
 320x240Fig 19640x480 |
| Figure 18 is a medium close-up of Aki (Jeff) running across the Rugger Guard's (Explorer) deck. He then runs toward the camera in Figure 19. |